Tuesday, July 31, 2012

POVRay Cartography City

Latest version with beach and city added.


Houses Generated by Scripts

Working on some scripts for creating houses.  This one uses Illustrator.  Pretty rough at this point.
POVRay code (use at your own risk):


global_settings {max_trace_level 5}
background {rgb <1,1,1>}
//camera {orthographic location <30-15*clock,0,0> rotate <clock*60,clock*30,clock*360> look_at <0,0,0> angle 22}
camera {orthographic location <0,20,-40> look_at <0,0,0> angle 20}
light_source {<80,100,40> rgb .5 }
light_source {<20,200,20> rgb .8 }
    
height_field {
    png "house_roofs.png"
    //smooth 
    translate <-.5,0,-.5>
pigment {
      gradient y       //this is the PATTERN_TYPE
      color_map {
        [0.0  color <.2,.1,.0>]
        [0.5  color <.2,.1,.0>]
        [0.7  color <.9,.4,.2>]
        [0.9  color <.9,.3,.2>]
        [1.0  color <.9,.3,.1>]
      }                     }
    scale <17, 1, 17>
    finish {roughness .1 specular .5 ambient .2}
  }


A collection of houses generated from the following gray scale.


This is the JavaScript that drives the Illustrator program.  Use at your own risk.

/**********************************************************
Roofs.js


DESCRIPTION


This script creates the roofs for a random village
**********************************************************/


var thisDoc = app.documents.add();
var artLayer = thisDoc.layers.add();


var gray = Math.random()*50+50; 
var myGradient = createGradient(gray);
var lineColor = new RGBColor();
lineColor.red = gray + 50;
lineColor.green = gray + 50;
lineColor.blue = gray + 50;
for (j = 0; j != 20; ++j)
 {
  var piRef = artLayer.pathItems;
  var roofGroup = artLayer.groupItems.add();


// Make both sides of a roof and a center line
  for ( i = 0; i != 2 ; ++i )
  {
// Create the roof shape
  var rect = artLayer.pathItems.rectangle(150, 220+75*i, 75, 110);
rect.filled = true;
rect.stroked = false;
rect.fillColor = myGradient;
redraw();
  rect.rotate(180*i)
  rect.moveToBeginning(roofGroup);
  }
  var pathRef = piRef.add()
pathRef.setEntirePath( new Array(
new Array(295, 40),
new Array(295,150)));
pathRef.stroked = true;
pathRef.strokeColor = lineColor;
  pathRef.moveToBeginning(roofGroup);


  roofGroup.resize(Math.random()*10+10,Math.random()*10+10)
  roofGroup.rotate(Math.random()*100)
  roofGroup.translate(Math.random()*200,Math.random()*200)


}


function createGradient(gray)
{


// Create color objects for both ends of the gradient
var startColor = new RGBColor();
var endColor = new RGBColor();
var gray1 = gray+50

startColor.red = gray;
startColor.green = gray;
startColor.blue = gray;
endColor.red = gray1;
endColor.green = gray1;
endColor.blue = gray1;


// Create a new gradient
// A new gradient always has 2 stops
var theGradient = app.activeDocument.gradients.add();
theGradient.name = "myGradient";
theGradient.type = GradientType.LINEAR;


// Modify the first gradient stop
theGradient.gradientStops[0].rampPoint = 0;
theGradient.gradientStops[0].midPoint = 50;
theGradient.gradientStops[0].color = startColor;


// Modify the last gradient stop
theGradient.gradientStops[1].rampPoint = 100;
theGradient.gradientStops[1].color = endColor;


// Construct an Illustrator.GradientColor object referring to the
// newly created gradient
var myGradientColor = new GradientColor();
myGradientColor.gradient = theGradient;
return myGradientColor;
}

Monday, July 30, 2012

POVRay Terrain


This is a terrain example I have been working on over at Cartographer's Guild.

DnD City Doodles

These three images were some doodles I did in my notebook a few years ago.
The above is a science fiction type of city in some mountains.

The next one I called Halloween City.


I liked this worm like creature armed with the spiked spear.

Thursday, July 19, 2012

POVRay Cartography


Over the next couple of blogs I will show how to make a cartographic map using POVRay and Photoshop.  Starting with a turbulent bozo gray scale pattern I selected an area copied to a new layer and decreased the contrast and brightness.


camera {location <-.5,1,0>  look_at <0,-.1,0>}
light_source { <-2,7,2> color rgb 1}
light_source { <1,7,3>  color rgb .5}
global_settings { ambient_light rgb 1.5 }
background { color rgb 1 }


// Forrest and Mountain
#declare T_Terrain01 = 
texture {
  pigment {
    gradient y
    color_map {
      [.00 color rgb<.7,  .7,  .5>]
      [.40 color rgb<0,  .2,  0>]
      [.58 color rgb<.2, .5,  .1>]
      [.66 color rgb<.4, .4,  .3>]
      [.73 color rgb<.3, .2,  .6>]
      [.80 color rgb<.9, .9,  1>]
      [.90 color rgb<1,  1,   1>]
      [1.0 color rgb<1,  1,   1>]
    }
  }
    finish { ambient 0.225 diffuse 0.75 crand 0.01975 }
}


// Desert
#declare T_Terrain02 =
texture {
  pigment {
    gradient y
    color_map {
      [.00 color rgb<.10, .20, .1>]
      [.05 color rgb<.20, .20, .2>]
      [.40 color rgb<.50, .50, .6>]
      [.60 color rgb<.48, .45, .4>]
      [.80 color rgb<.50, .45, .4>]
      [.90 color rgb<.60, .55, .5>]
      [.95 color rgb<.65, .65, .5>]
      [.999 color rgb<.70, .65, .5>]
      [1.0 color rgb<.10, .20, .1>]
    }
  }
    finish { ambient 0.225 diffuse 0.75 crand 0.01975 }
}


// Volcanic
#declare T_Terrain03 =
texture {
  pigment {
    gradient y
    color_map {
      [.00 color rgb<.5,  .7,  1>]
      [.10 color rgb<.8,  1,  1>]
      [.20 color rgb<1,  1,  1>]
      [.30 color rgb<1,  .9,  .7>]
      [.40 color rgb<0,  .2,  0>]
      [.60 color rgb<.2, .4,  .1>]
      [.80 color rgb<.4, .2,  .0>]
      [.93 color rgb<.3, .0,  .0>]
      [.95 color rgb<.6, .2,  .1>]
      [1.0 color rgb<.0,  0,   0>]
    }
  }
    finish { ambient 0.225 diffuse 0.75 crand 0.01975 }
}


// Mountains and Forest
#declare T_Terrain05 =
texture {
  pigment {
    gradient y
    color_map {
      [.00 color rgb<0,  0,  .2>]
      [.40 color rgb<0,  .2,  .2>]
      [.60 color rgb<.2, .5,  .1>]
      [.70 color rgb<.4, .4,  .3>]
      [.85 color rgb<.3, .2,  .6>]
      [.90 color rgb<.9, .9,  1>]
      [.95 color rgb<1,  1,   1>]
      [1.0 color rgb<1,  1,   1>]
    }
  }
    finish { ambient 0.225 diffuse 0.75 crand 0.01975 }
}


height_field {
    png "gray_terrain02.png"
    smooth
    texture {T_Terrain01}
    translate <-.5, .1, -.5>
    scale <1, .15, 1>   
    rotate <0,0,0>
  }


plane { y, -1.0 texture {pigment {color rgbt <0,.2,1,.5>}} translate <0,1.02,0>}


fog {
    distance 2
    color rgbt .5
        fog_type 2
    fog_offset  .1
    fog_alt .1
  }

Wednesday, July 18, 2012

Tile Sets


POVRay has a large number of stone textures available.  I used this one to create a set of tiles.  These can be imported into Photoshop and used to create dungeon crawl maps like I posted earlier.

This one has surface texturing so it takes "forever" to render (>24 hrs! at 1024 x 768).  If I remove the texturing I can get it down to a more reasonable rendering time without losing much detail in fact it may even look better.


/*
Tilesets for D&D
by Hans Mikelson July 2012
*/ 
#include "colors.inc"
#include "textures.inc"
#include "shapes.inc"
#include "stones.inc"
#include "woods.inc"
#include "metals.inc"
#include "skies.inc" 
           
#declare q  = 0;       // Set to 1 to use isosurface but that will render *much* slower.
#declare q2 = 1;     // This controls the light sources change to 0 to zoom in.
#declare paver = T_Stone29;  // Change these to try out other stone textures
#declare grout = T_Stone32;


#if (q2)
  light_source {<-400, 500, 400> color 1.5 spotlight radius 15 falloff 18 tightness 10 area_light <1, 0, 0>, <0, 0, 1>, 2, 2 adaptive 1 jitter point_at <0, -.5, 0>}
  camera {orthographic location <.5,10,.5>  look_at <.5,0,.5> up 12*y right 16*x}
#else
  light_source { <-40,50,40> color rgb 1.5}
  camera {orthographic location <0,10,0>  look_at <0,0,0> up 3*y right 4*x}
#end
  
global_settings { ambient_light rgb 1.6}
background { color rgb 0 }


#if (q)
    plane { y, -1 hollow on texture {grout scale .5} translate <0,1.07,0>}
#else
    plane { y, -1 hollow on texture {grout scale .5} translate <0,1.54,0>}
#end


#declare fb3    = function {pattern {crackle turbulence .01 octaves 5 omega 1.8 lambda 1.5 scale .2}} ;
#declare fb4    = function {pattern {bozo turbulence .05 octaves 5 omega 1.8 lambda 1.5 scale 2}} ;


#declare i = -10;
#while(i <= 10)


  #declare j = -10;
  #while(j <= 10)
    #if (q)
      isosurface {function {f_rounded_box(x,y,z, .1,.48,.1,.48) + fb3(x-i,y,z-j)*.008+fb4(x-i,y,z-j)*.1-.04} contained_by{sphere{0,1}} max_gradient 6.0 texture{paver translate <i,0,j>} finish {specular 0.4 roughness 0.06} translate <i,0,j>}
    #else
      superellipsoid {<.1,.2> texture { paver translate <i,0,j>} finish {specular 0.6 roughness 0.03} scale <.48,.6,.48>  translate <i,0,j> }
    #end
    #declare j = j + 1;
  #end
  #declare i = i + 1;
#end


Here is the image generated by the above code:


And another:


Erosion Algorithm


I read an article about some researchers who were trying to simulate erosion numerically a few years ago and I was somewhat disappointed by the purely random appearance of the terrains I was creating at the time so I wrote my own program for simulating erosion using Python.  This requires that you have python and PIL (Python Imaging Library) installed on your system.

The following two images illustrate before and after erosion is applied to the height map.

This results in decent erosion but the algorithm produces some sharp edges so I usually load the file into photoshop and give it some blur and adjust the contrast before rendering it.


from PIL import Image
from random import *

def erode(n=200000,nl=50,ev=.25,maxx=319,maxy=239):
    im = Image.open("gray_terrain01.png")
    
    for k in range(n):
        cx = int(uniform(1,maxx-1))
        cy = int(uniform(1,maxy-1))
        for l in range(nl):
            cv,cv,cv = im.getpixel((cx,cy))
            mini = cx
            minj = cy
            minv = cv
            #print "cent",cv
            for i in range(3):
                for j in range(3):
                    iv,iv,iv = im.getpixel((cx+i-1,cy+j-1))
                    #print iv
                    if (iv<minv):
                        mini = cx+i-1
                        minj = cy+j-1
                        minv = iv
            #print "min",mini,minj
            if (minv<cv):
                hard = (256.0-cv)/256.0
                erod_val = ev*hard
                iv = int(minv + (cv-minv)*erod_val)
                cv = int(cv - (cv-minv)*erod_val)
                #print "down",cv,
                #print "up",iv
                x = cv,cv,cv,
                y = iv,iv,iv,
                im.putpixel((cx,cy),x)
                im.putpixel((mini,minj),y)
                cx=mini
                cy=minj
            else:
                break
            if cx <= 0:
                break
            if cy <= 0:
                break
            if cx >= maxx-1:
                break
            if cy >= maxy-1:
                break
    
    im.save("eroded.png")

erode()


Tuesday, July 17, 2012

Terrain Island

For this one I did a couple of tricks.  I used a special program I wrote that simulates erosion (think acid rain)  That erodes away high points and pushes the material to lower points.  I then used Photoshop to darken the areas around the island.  This leaves the image shown.  Below is another example of the erosion algorithm.


Changing the Textures

Made some changes to the code to get a volcanic look.


camera {location <0,5,0> look_at <0,0,0>}
global_settings { ambient_light rgb 11}
plane {y, -1.0 pigment {bozo turbulence .8 lambda 2.0 color_map {[0.00 color rgb <0,0,0>] [1.00 color rgb <1,1,1>]}}}


Using lambda to create a slightly different texture.

Then declared several different textures so it is easy to change them around to see which looks best.


camera {location <0,1,.5>  look_at <0,0,0>}
light_source { <-2,7,2> color rgb 1}
light_source { <1,7,3>  color rgb .5}
global_settings { ambient_light rgb 1.5 }
background { color rgb 1 }


// Forrest and Mountain
#declare T_Terrain01 = 
texture {
  pigment {
    gradient y
    color_map {
      [.00 color rgb<.7,  .7,  .5>]
      [.40 color rgb<0,  .2,  0>]
      [.60 color rgb<.2, .5,  .1>]
      [.70 color rgb<.4, .4,  .3>]
      [.85 color rgb<.3, .2,  .6>]
      [.90 color rgb<.9, .9,  1>]
      [.95 color rgb<1,  1,   1>]
      [1.0 color rgb<1,  1,   1>]
    }
  }
    finish { ambient 0.225 diffuse 0.75 crand 0.01975 }
}


// Desert
#declare T_Terrain02 =
texture {
  pigment {
    gradient y
    color_map {
      [.00 color rgb<.10, .20, .1>]
      [.05 color rgb<.20, .20, .2>]
      [.40 color rgb<.50, .50, .6>]
      [.60 color rgb<.48, .45, .4>]
      [.80 color rgb<.50, .45, .4>]
      [.90 color rgb<.60, .55, .5>]
      [.95 color rgb<.65, .65, .5>]
      [.999 color rgb<.70, .65, .5>]
      [1.0 color rgb<.10, .20, .1>]
    }
  }
    finish { ambient 0.225 diffuse 0.75 crand 0.01975 }
}


// Volcanic
#declare T_Terrain03 =
texture {
  pigment {
    gradient y
    color_map {
      [.00 color rgb<.5,  .7,  1>]
      [.10 color rgb<.8,  1,  1>]
      [.20 color rgb<1,  1,  1>]
      [.30 color rgb<1,  .9,  .7>]
      [.40 color rgb<0,  .2,  0>]
      [.60 color rgb<.2, .4,  .1>]
      [.80 color rgb<.4, .2,  .0>]
      [.93 color rgb<.3, .0,  .0>]
      [.95 color rgb<.6, .2,  .1>]
      [1.0 color rgb<.0,  0,   0>]
    }
  }
    finish { ambient 0.225 diffuse 0.75 crand 0.01975 }
}


// Mountains and Forest
#declare T_Terrain05 =
texture {
  pigment {
    gradient y
    color_map {
      [.00 color rgb<0,  0,  .2>]
      [.40 color rgb<0,  .2,  .2>]
      [.60 color rgb<.2, .5,  .1>]
      [.70 color rgb<.4, .4,  .3>]
      [.85 color rgb<.3, .2,  .6>]
      [.90 color rgb<.9, .9,  1>]
      [.95 color rgb<1,  1,   1>]
      [1.0 color rgb<1,  1,   1>]
    }
  }
    finish { ambient 0.225 diffuse 0.75 crand 0.01975 }
}


height_field {
    png "gray_terrain01.png"
    smooth
    texture {T_Terrain03}
    translate <-.5, .1, -.5>
    scale <1, .2, 1>   
    rotate <0,0,0>
  }
plane { y, -1.0 texture {pigment {color rgbt <0,.2,1,.5>}} translate <0,1.10,0>}


    texture {T_Terrain02}


Monday, July 16, 2012

Creating Terrains with POVRay


In this blog I will describe how to make some terrains with POVRay like those shown in the above image.  This is a simple way to make some great looking terrain maps for your campaign.  In order to do this you will need to get POVRay and install it.

The process takes two steps.

  1. Create a gray scale height map of the surface where white represents high and black represents low.
  2. Use the gray scale map to render a terrain surface.
Step 1. I will start out with a simple example and gradually make it more complex.  The first step will be to use the POVRay pattern bozo to create the surface.  Bozo is like a smoothly varying random surface.  An example of this is given by the following POVRay code:


camera {location <0,10,0> look_at <0,0,0>}

light_source {<0,100,0> rgb 1 shadowless}

plane {y, -1.0 pigment {bozo color_map {[0.00 color rgb <0,0,0>] [1.00 color rgb <1,1,1>]}}}


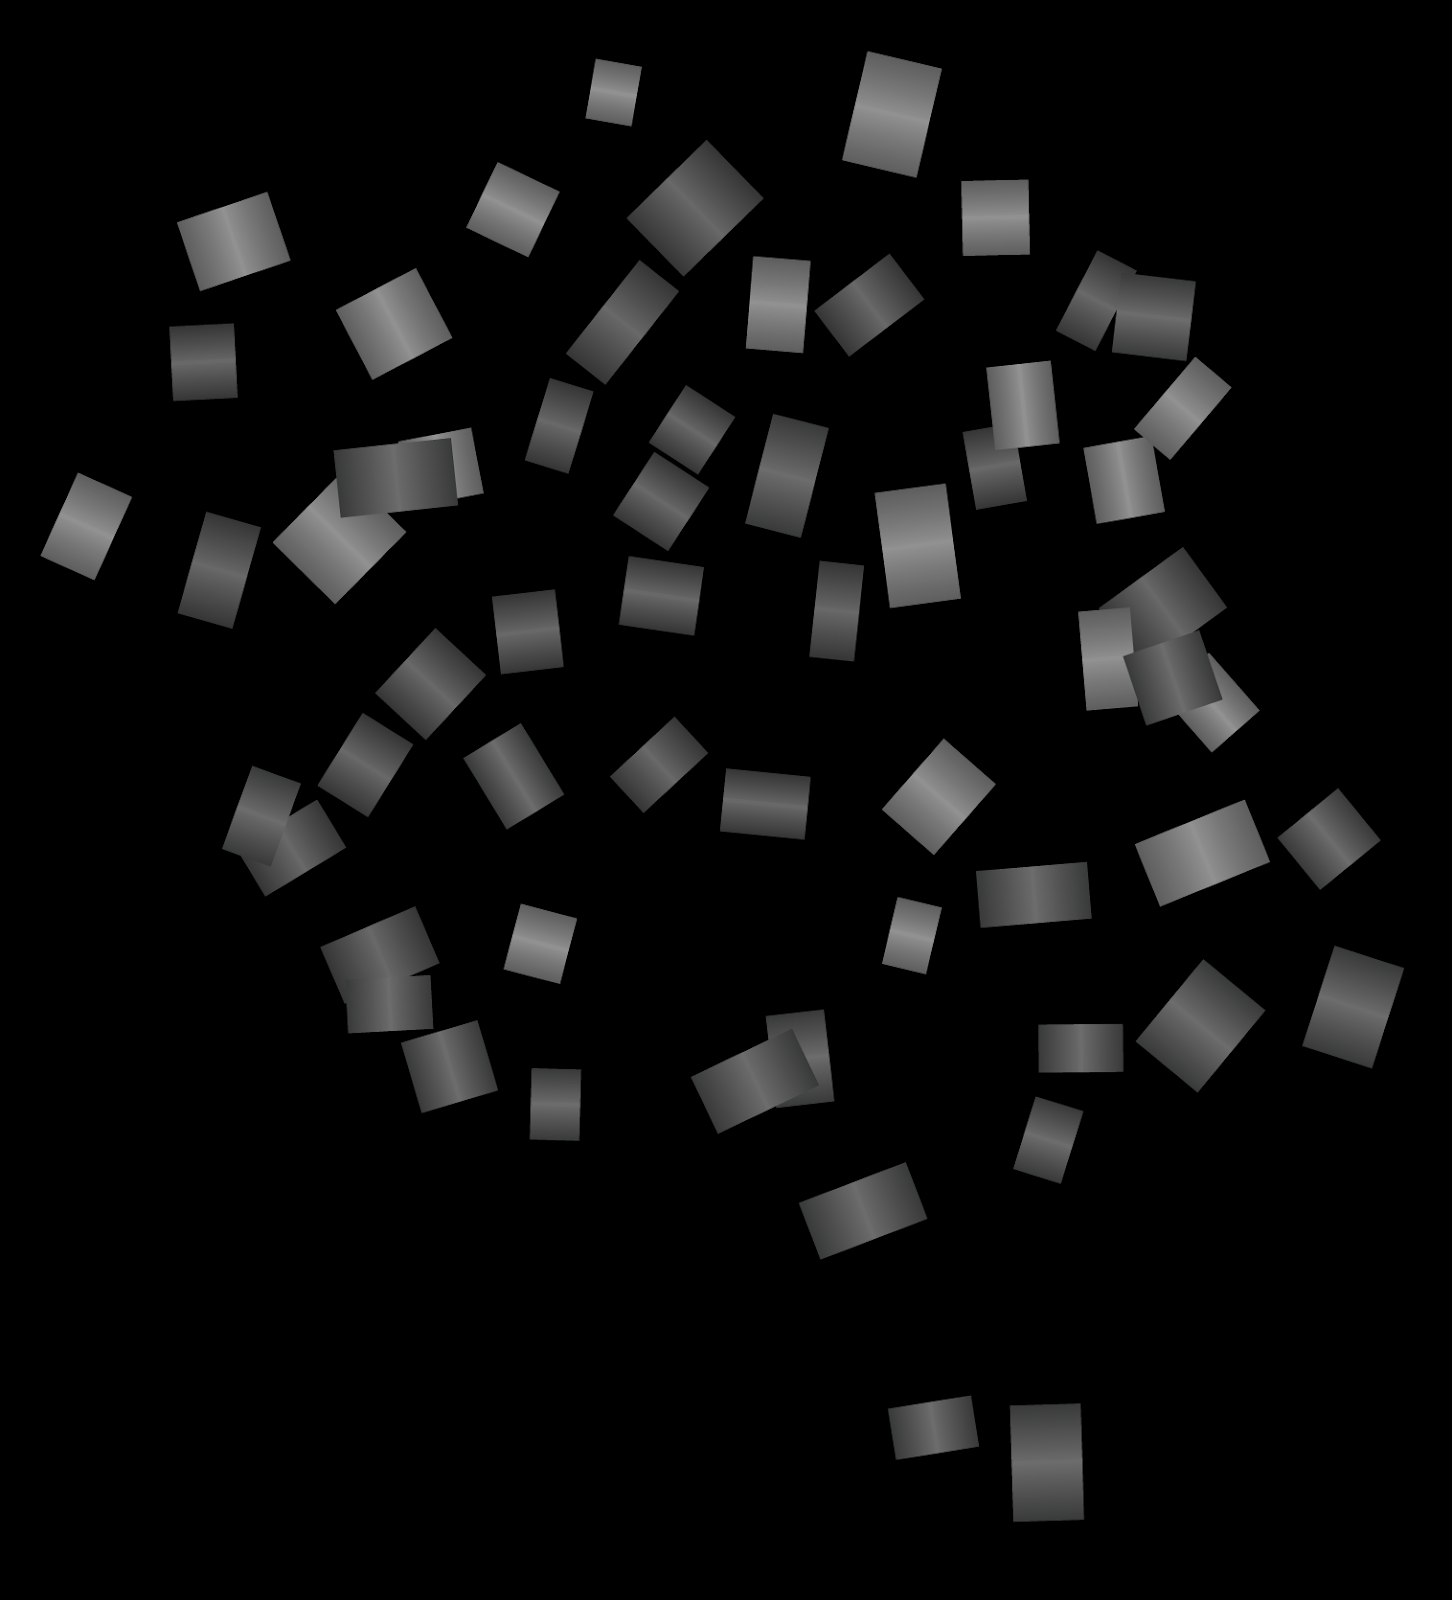
This code should produce an image something like the following.  I used the +FN option on the render to make the file a png graphic type file since POVRay does not do jpg.
I will explain the code briefly.  The first line generates a camera that is at a certain position (x,y,z) coordinates and is looking at a certain point in space.
The second line puts a light source at a certain location in space.
The third line makes a flat plane and colors it according to the bozo pattern.  The color map goes from black at values of 0 to white at values of 1.  rgb represents the color based on values of red, green, and blue going from 0-1.  For more info read the manual.

Step 2.  I will use this image to make a height field or terrain surface.

camera {location <0,2,.5>  look_at <0,0,0> angle 60}
light_source { <-2,7,2> color rgb 1}
global_settings { ambient_light rgb 1.5 }
background { color rgb 1 }

height_field {
    png "gray_terrain.png"
    smooth
    texture {pigment{rgb .5} finish { ambient 0.225 diffuse 0.75 crand 0.01975}} 
    translate <-.5, .1, -.5>
    scale <1, .5, 1>   
    rotate <0,0,0>
  }
The next code is used to generate the surface.  It should look something like the following at this point.
>

This one has a camera, a light source, some ambient light in the global settings, anything that is not an object is colored white by the background  statement.

The main object here is the height_field object.  It uses the png file created by the previous program.  I called my program gray_terrain.pov so the file it created was called gray_terrain.png.  This is going to use the png file indicated to make a gray height surface from it.
Not too impressive yet.  Next I will add a better pigment to get some better color.

camera {location <0,1,.5>  look_at <0,0,0>}
light_source { <-2,7,2> color rgb 1}
//light_source { <1,7,3>  color rgb .5}
global_settings { ambient_light rgb 1.5 }
background { color rgb 1 }

height_field {
    png "gray_terrain.png"
    smooth
texture {
  pigment {
    gradient y
    color_map {
      [.00 color rgb<.7,  .7,  .5>]
      [.40 color rgb<0,  .2,  0>]
      [.60 color rgb<.2, .5,  .1>]
      [.70 color rgb<.4, .4,  .3>]
      [.85 color rgb<.3, .2,  .6>]
      [.90 color rgb<.9, .9,  1>]
      [.95 color rgb<1,  1,   1>]
      [1.0 color rgb<1,  1,   1>]
    }
  }
    finish { ambient 0.225 diffuse 0.75 crand 0.01975 }
}
    translate <-.5, .1, -.5>
    scale <1, .3, 1>   
    rotate <0,0,0>
  }

This should give you something like the following:

Getting a little better.  Next I will make a more complex surface.
camera {location <0,10,0> look_at <0,0,0>}
global_settings { ambient_light rgb 10}
plane {y, -1.0 pigment {bozo turbulence .5 color_map {[0.00 color rgb <0,0,0>] [1.00 color rgb <1,1,1>]}}}


Added turbulence .5 (as well as adjusting the lighting).
camera {location <0,1,.5>  look_at <0,0,0>}
light_source { <-2,7,2> color rgb 1}
light_source { <1,7,3>  color rgb .5}
global_settings { ambient_light rgb 1.5 }
background { color rgb 1 }

height_field {
    png "gray_terrain.png"
    smooth
texture {
  pigment {
    gradient y
    color_map {
      [.00 color rgb<.7,  .7,  .5>]
      [.40 color rgb<0,  .2,  0>]
      [.60 color rgb<.2, .5,  .1>]
      [.70 color rgb<.4, .4,  .3>]
      [.85 color rgb<.3, .2,  .6>]
      [.90 color rgb<.9, .9,  1>]
      [.95 color rgb<1,  1,   1>]
      [1.0 color rgb<1,  1,   1>]
    }
  }
    finish { ambient 0.225 diffuse 0.75 crand 0.01975 }
}
    translate <-.5, .1, -.5>
    scale <1, .2, 1>   
    rotate <0,0,0>
  }

This is basically the same code as before, but with the new file.  And following is the resulting terrain.

plane { y, -1.0 texture {pigment {color rgbt <0,.2,1,.5>}} translate <0,1.08,0>}

To add some water add the above plane and use the translate 1.08 value to adjust the height of the water.


That is all there is to the basic terrain generator.  I will explain a few more things in upcoming blogs.

Cityscape

Rough draft of a cityscape.

I based this on Brandon Kruse's D and D Doodle

Sunday, July 15, 2012

Korgoth Swamp

Korgoth Swamp: Home to lizardfolk, bullywugs, and troglodytes.  This was my most successful campaign although I think the players got sick of mucking around in the swamp.

In ancient times this was a beautiful lake region where the royalty would go for recreation.  A series of baths were created.  It later became the site of a great battle between wizards and druids.  During the battle a rift was torn between the planes connecting planes of earth, water, and limbo.  Transforming this region to a swampland.  The druids were able to seal the rift but the seal was fragile and so guards were set to ensure no one would try to open the rift again.

In recent times the constant summoning spells of the bullywugs have begun to weaken the rift.

The players spent so much time in this swamp I even put in a swamp Inn called The Bog for the players to rest up.  The bullywug village is shown above.  Gardenia is the village of the gnomes located outside of the swamp.  Gardenia can only be seen by friends of the gnomes, otherwise it is hidden by illusion.

The center of the concentric circles labeled Chaos indicates the location of the rift seal.  There is a small castle located at the site labeled giant.  The ruins in the center are the remains of the original Pleasure Palaces.
The lizard folk have a village in the swamp shown above.  The blue dots along the border indicate the location of lizard folk guards.

This is a small Chateau built on the edge of the lake but since the waters have been rising the place has fallen into ruin.  There is a swamp giant living in the caves.